Preventative Tips
When estimating what it would cost to waterproof a basement there are several factors to take into consideration. First, is the source of the water in the basement. Common causes of a wet basement are condensation, leaking wall cracks, seepage through the joint where the floor and walls meet and seepage up through basement floor cracks. Basement waterproofing costs will greatly depend on the source of the problem, so lets break down the cost by the source – but first here are a few preventative tips to help keep your basement dry…
PREVENTATIVE TIPS
Check around your home’s foundation looking for any low spots, service walks that are tilting in due to ground settling down next to the foundation, downspouts properly attached and debris such as leaves in window wells causing water to over flow the basement windows. If you find low spots fill them in with dirt, grading it away from the home. If you have settling walking paths adjust them so they are no longer damming water from flowing away from the. Be sure you have gutters and downspouts on your home to properly dispose roof water runoff (one of the biggest culprits creating a wet basement) and make sure your downspouts are always properly connected carrying the water a minimum of 8 feet from your foundation. These simple preventative tips should be your first steps when fixing your wet basement problem. Many leaky basements can be dried up with these easy tips and will save you money and headache. Now, lets breakdown the different basement waterproofing costs and options…
CONDENSATION
Condensation is when water droplets in humid air comes in contact with cold surfaces turning the vapor into water. Condensation often collects on concrete surfaces like your walls and floor. A low cost remedy to this type of basement condition is simply add a box fan to your basement to help circulate the air, which prevents the vapor from condensing and turning into liquid. You could also want to add a dehumidifier to the basement to collect the moisture from the air. For most basements you want to keep the humidity level at or below 50% relative humidity. When you go above 80% humidity your chances of mold and mildew greatly increase.
Total Cost: $264
$29 for a box fan + $235 for a dehumidifer
LEAKY WALL CRACK
Leaky wall cracks are most commonly found in poured wall foundations. Vertical wall cracks can be fixed by applying a sealant to the crack, like our CRACK Foundation Repair. This will seal off the crack preventing water from entering through the wall crack. It’s important also take preventative measures to keep water from entering your basement and for that you need to take a look outside your home to address key areas that drive water into your basement every time it rains or snow thaws (read the preventative tips above for more info).
Total Cost: $45 to $205
$30 for CRACK Foundation Repair + $15 for simple tools like a putty knife, wire brush & caulking gun. You might also want to add downspout extension around your home to divert the water, which will help prevent pooling water around the foundation. We calculate about $40 per downspout to install an UnderGround Downspout and PVC pipe.
WATER SEEPAGE WHERE FLOOR & WALLS MEET
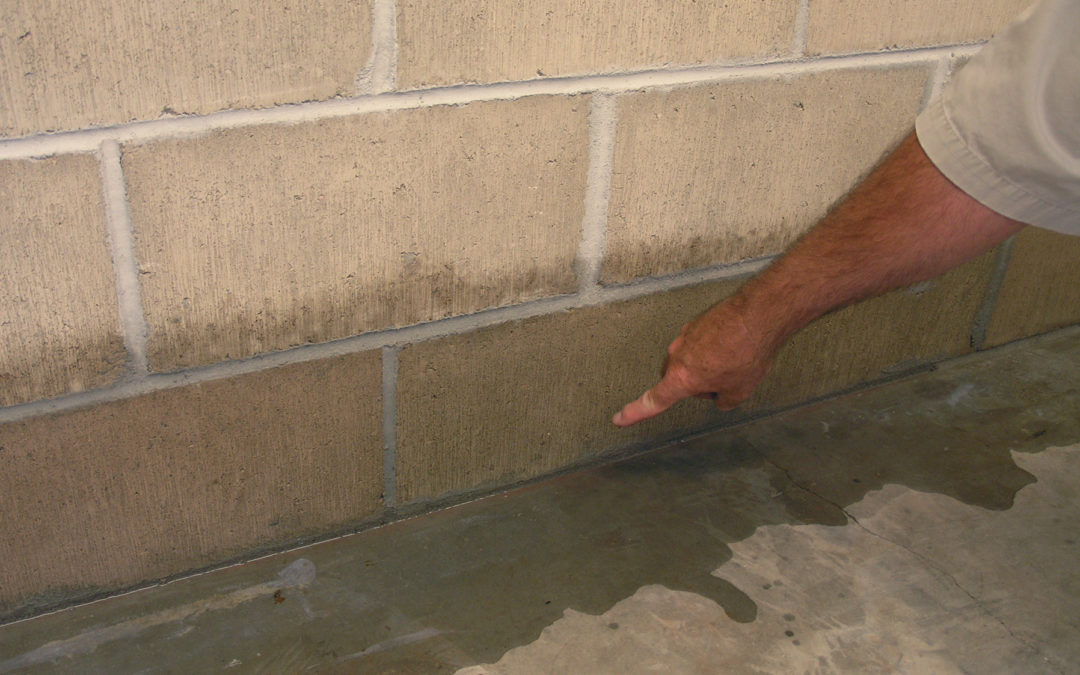
The joint where the floor and walls meet is commonly called the “cold” or “cove” joint. This is the most common source of a wet basement, affecting nearly 90% of all wet basements. As hydrostatic pressure around your home’s foundation builds up it forces exterior water into the basement through the open cold joint.
Many do-it-yourself homeowners initial idea is to find a way to push back or stop the seepage with waterproofing paints or hydraulic cement. These methods are cheap, “quick fixes” to a leaky basement, but won’t last longterm and often create a bigger problem as water will build up higher in the walls and can find new ways into the basement. Waterproofing paints typically cost around $50 a gallon and require a great deal of prep work labor to apply. Hydraulic cements cost around $10 for a 10 lb. pail, which can be very appealing to a homeowner looking for a cheap fix, but they often regret their choice when water begins to build up in their walls and popping and cracking the hydraulic cement. These bandaid quick fixes should be avoid because they will not solve the problem.
Now, that we’ve addressed some of the common do-it-yourself methods lets talk about permanent solutions to a wet basement and their associated costs.
The most expensive basement waterproofing cost and option is exterior waterproofing. This requires a great deal of labor and stress on your home and it has several drawbacks when adding to an existing home. Exterior waterproofing relies on a waterproof membrane sprayed or brushed onto the exterior face of a home’s foundation walls to create a water barrier. The best time to apply an exterior waterproofing membrane is during construction of the home. This can act as a preventative measure to help keep moisture out of the basement.
Exterior waterproofing isn’t an ideal remedy for an existing home, as you would need to excavate around your home to exposed the foundation walls. The biggest drawback to this option for an existing home is the high expense and possible damage and disruption it can cause to your home. Exterior waterproofing membranes and drain tiles are limited in their effectiveness. Most exterior drain tile systems clog overtime with silt, which leaves them useless and inaccessible.
Total Cost: $15,000 to $35,000
Exterior waterproofing is the most expensive and has limited effectiveness on existing homes.
Interior basement waterproofing systems are the best approach to waterproofing an existing home. There are 3 main interior waterproofing options:
1. Above floor baseboard channels are the best do-it-yourself waterproofing option for homeowners because they tap into hydrostatic pressure versus common do-it-yourself methods that try to hold back or plug a wet basement. An above floor baseboard channel doesn’t require busting up your basement floor, which makes a do-it-yourself system friendly. Many contractors install these system in monolithic basements, which means the basement walls and footing are one. You do not want to bust up a monolithic basement floor. Above floor baseboard channels, like the SealOnce™ Basement System, is very effective option (and affordable) and will dry up a basement who’s water source is through the cold joint.
Total Cost: $6 per ft (DIY Installation) to $30 per ft (Contractor Installation)
SealOnce™ Basement System is a permanent do-it-yourself fix to a wet basement. You will save yourself thousands of dollars installing the system yourself, but many contractors offer these non-invasive channels.
2. Footer drainage systems are a favorite among contractors because it requires less labor then old-fashioned pipe and gravel and is extremely effective. Footer drainage systems require busting up your basement floor to expose the footing, then a drainage channel is placed on top of the concrete footing around the perimeter of the basement draining into a sump pump system. A benefit to this type of system is it is not sitting in any dirt or soil that could clog the system.
Total Cost: $20 to $35 per ft
Footer drainage systems are a professionally installed basement waterproofing channel that is very effective, but will cost several thousands of dollars.
3. Subfloor drain tile systems are an industry standard in basement waterproofing. These systems vary in sophistication and effectiveness. Old-fashioned pipe and gravel is very cheap in material costs, but expensive in labor costs as you need to bust up and dig very large, deep trench in a basement floor for it to be effective. Old-fashioned pipe and gravel is an effective system, but has it’s drawbacks. These systems frequently get clogged because they are sitting in dirt. They need a good deal of pitch and a lot of water in them to create flow. An old-fashioned drain tile job would likely take 2 to 4 days and would cost several thousand dollars (mostly paying for labor). The basement waterproofing industry has evolved greatly over the past few decades in the development of hybrid basement waterproofing systems that are more effective with water flow then old-fashioned pipe and gravel, and require a lot less labor. Many of these new systems come with inspection ports, giving you access to the system after its been installed to flush the system out if needed.
Total Cost: $25 to $55 per ft
Subfloor drainage systems are a professionally installed basement waterproofing channel that is very effective, but will cost several thousands of dollar.
SEEPAGE THROUGH THE MIDDLE OF FLOOR
Having a leak up through the middle of your basement floor is uncommon. If you have a crack in your basement floor that is leaking you’ll want to figure out if the water is truly coming up through the floor or if the crack is being feed by the wall and cold joint area (this is most often the case). If the water is coming up through the middle of the basement floor a subfloor system is necessary to remedy this problem. A contractor will install a subfloor system around the perimeter of the basement floor and will most likely run a vein out into the middle of the basement to collect the water in the center of the foundation.
Total Cost: $25 to $55 per ft
A subfloor drain tile system is necessary to remedy this type of wet basement.
BASEMENT WATERPROOFING COSTS OVERVIEW
Basement waterproofing costs vary greatly depending on the source of the water issue. The simple preventative tips we listed above can help to lesser your water issue or elimiate it all together. It’s important to first identify the source of your wet basement before selecting a basement waterproofing method. This with ensure you a dry basement at a reasonable cost.
If you plan to waterproof your basement yourself take a look at our DIY basement waterproofing guide for helpful tips and advice. If you’re looking for a quote for your basement project visit our SealOnce™ Basement System.
When hiring a contractor be sure to get multiple estimates and opinions from different local waterproofing companies. We recommend getting at least 3 different estimates from 3 different companies. Also, be sure to ask for multiple customer testimonials from each company and follow up with them. Having multiple estimates will help you determine what is the average cost for waterproofing in your area.
Do-it-yourself Waterproofing Tips
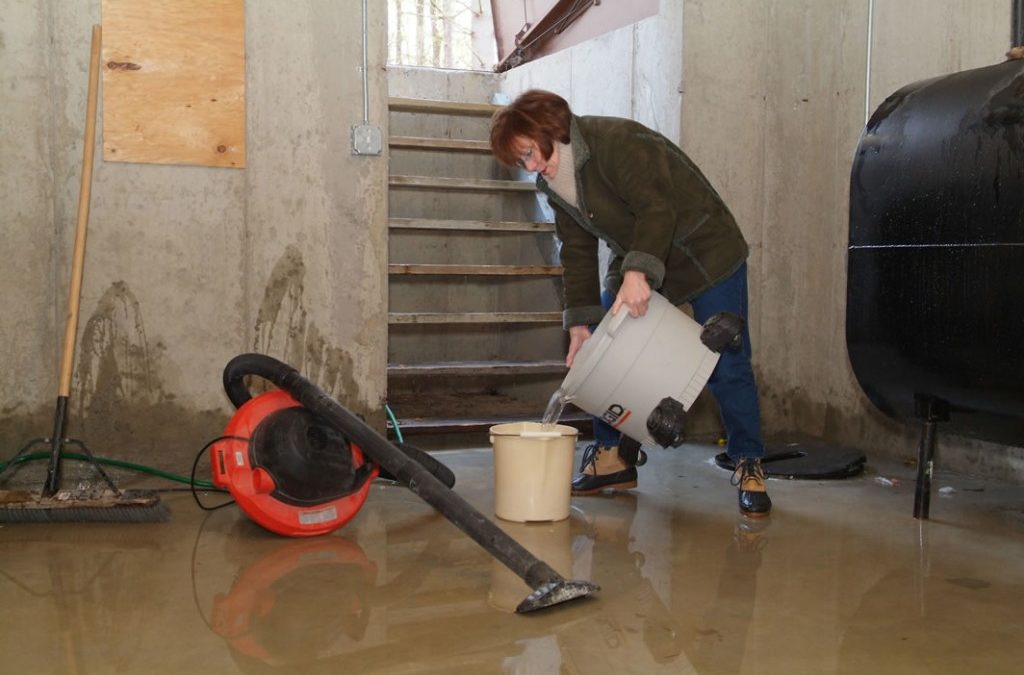
So what’s next after a heavy rain and your basement is flooded with water? The good news is surface water, wall seepage or back-flow from sewer lines typically causes little to no structural damage to your basement or foundation. The water inside the basement braces the walls against the pressure of outside water and waterlogged soil.
1. Drain water out of a the basement
Wait to drain out basement water until the water level outside the home has decreased and a majority of it is gone. This will prevent the basement walls from pushing in or buckling and prevent the basement floor from heaving. If there is a large amount of water in the basement or if there is no basement drain, you may need to buy or rent a sump pump to get rid of the standing water.
If your electrical panel is located in an area of your home that has been flooded, you will be unable to use an electric sump pump, unless you use a pump driven by a 12-volt auto battery. Stop pumping when the two water levels become equal. Pump the basement water out at the same rate at which the flood waters recede. This will keep the integrity of your foundational structure in-tacked.
2. Clean up and remove debris
Once you have drained the basement water you can being the process of cleaning your basement. Remove the silt and dirt residue from the basement walls with a high-pressure hose. Next, using a shovel collect all the mud and debris off the basement floors to encourage your basement to dry out. If the stains are stubborn and do not come clean with the hose, use a stiff bristle brush and household detergent to clean. Begin scrubbing at the top of the basement wall and work all the way down to the floor. Rinse often with clear water.
Begin drying your basement immediately. This will decrease the ability of mold and mildew growth that can cause an already unfortunate situation to become much worse. If you are sensitive to mold or mildew or see any mold in your basement, be sure to wear a mask or respirator containing an appropriate filter. Open all doors and windows to allow moisture to flow outside the basement. Fans will help to direct the moisture out the open doors and windows. A dehumidifier will help speed up the drying process by removing excess moisture in the air.
3. Install a basement waterproofing system
If you basement floods after a heavy rain or snow melt it is important to install a basement waterproofing system to remedy the issue and prevent future flooding and water seepage.
Do-it-yourself Waterproofing Tips
Mold and mildew can be a very costly basement problem. Here are simple preventative tips for homeowners to take to keep mold and mildew growth out of their basement.
How to prevent:
Concrete basement walls are very susceptible to mold and mildew because they are porous. The combination between porous basement walls and basement moisture are ideal conditions for mold and mildew to grow. Preventing mold growth is a very important issue for many homeowners. Mold can ruin the integrity of your basement foundation and the rest of your home.
One step a homeowner can take against mold is eliminating basement moisture and water. Installing the SquidGee Dry System will dry up your wet, leaky basement. The SquidGee Dry System is not used to cure a mold problem, but can be an effective step in preventing mold and mildew growth in a basement. Another effective step homeowners can do to help defend their home against mold growth is adding natural light. A dark, damp basement is the perfect breeding ground for mold and mildew. By introducing natural light to the surface of basement walls, mold will have a difficult time growing.
Common causes:
A wet basement is the perfect condition for mold and mildew growth, because it is usually dark, moist and lacks proper ventilation. Addressing common risk factors for mold and mildew growth before the spores have the opportunity to spread through a basement and home is very important for homeowners to maintain the value of their biggest investment – their home.
Excess moisture and humidity
Due to the location of a basement, it is often plagued with excess moisture and humidity. This combination of moisture and humidity in a basement is what fuels mold growth. Placing a dehumidifier in the basement will reduce the water in the air. Also, a fan directing the air out of the basement will also help keep the air dry. Another easy way to reduce the amount of moisture and humidity in a basement is by opening windows for proper air circulation.
Lack of proper ventilation
Without proper ventilation, basement moisture and humidity can increase to deadly levels in a basement. This can cause a water issue and provide the exact conditions mold and mildew need to grow and spread quickly through a home. Airing out your basement regularly will maintain proper ventilation in your basement.
Leaking water pipes
Leaking pipes can be a disaster in a basement. Not only will it help mold grow faster and can waste water quickly, but it can severely damage a everything in your basement. Check your basement water pipes in the spring for any leaks. Contact a plumber immediately if you find a leak to fix it before it becomes a costly headache.
Dark basement
Introducing your basement walls and floor to natural light will help prevent mold and mildew growth. Mold and mildew have a very difficult time cultivating when natural light is present.
Poor grading around home’s foundation:
Check outside your home’s foundation for poor grading around the basement. Fill in and slope the soil away from the home. Look for areas that contribute to the collection of water next to your foundation and fill in to prevent pooling water.
Lack of gutter system
If you don’t have gutters or downspouts on the home, it would be a wise investment to add them. If you have gutters, check for and remove any debris clogging the gutters. Also, it’s important that the downspouts around the home extend at least 8 feet from the house to direct roof water away. Service walks that settled and slope back to the house should be adjusted to flow away from your foundation.
Do-it-yourself Waterproofing Tips
1. Begin with ventilating the basement by opening up windows and doors to create air movement. Placing a dehumidifier and fans in your basement will help reduce the moisture levels in the air.
If ventilation does not remove odors…
2. Mop concrete floor and walls with a bleach solution (3/4 cups of household bleach to a gallon of water). Rinse and dry after 5 minutes. Be sure to open windows when applying the bleach solution. This will speed up the drying process and reduce inhalation of the bleach.
3. Place a lump of dry charcoal in an open tin/metal container to absorb odors. These simple steps can help reduce moisture levels and slow the process of mold and mildew growth. It is recommended to wear a mask when removing the musty basement smell.
4. Adding a dehumidifier will help to reduce the moisture in the air, which can help cut down on the musty smell in your basement.
Do-it-yourself Waterproofing Tips
What is hydrostatic pressure?
Hydrostatic pressure is what builds up around your basement’s foundation and pushes water seepage into your home’s foundation. As water builds up in the pocket of porous soil around the exterior basement walls gravity pulls the water downward forcing water seepage into the basement.
How to relieve hydrostatic pressure:
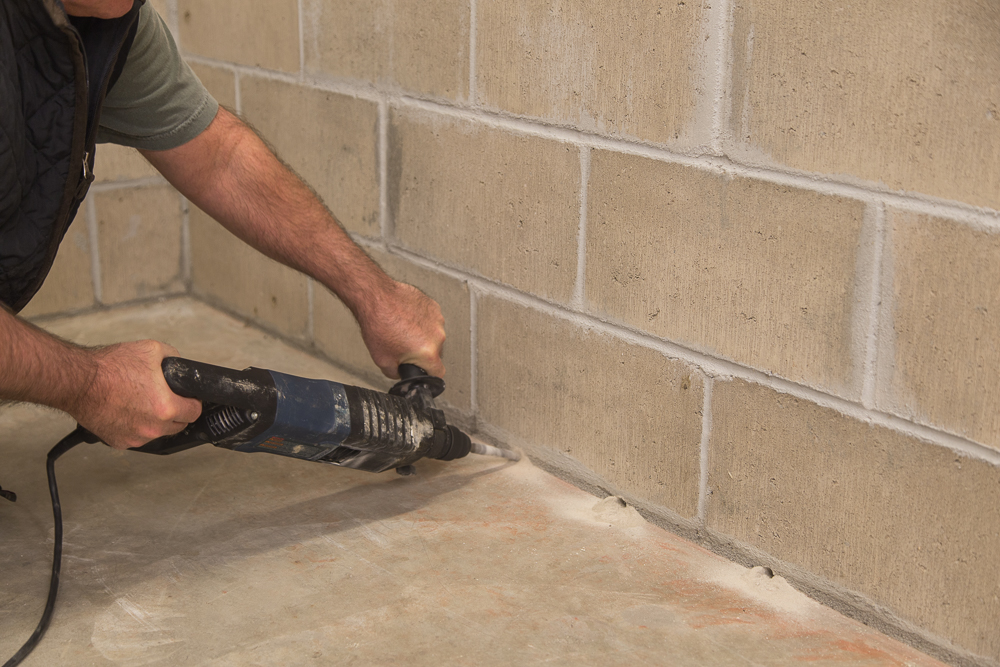
To relieve hydrostatic pressure around a basement, you will need to tap into the source of the water by drill weep holes into the hollow cores of the bottom row of blocks. This will allow the water to drain, now you need to install a baseboard system that will collect the water and drain it to your sump pump. SealOnce Basement System an above floor channel baseboard system works on both poured wall and block wall foundations to relieve the hydrostatic pressure pushing against your homes foundation.
Block wall foundations have hollow cells that fill with water, which creates hydrostatic pressure. Tapping holes in each main cell will keep water from building up into hydrostatic pressure. With the SealOnce Basement System it’s not necessary to drill every cell available. Poured wall foundations do not have hollow cells, therefore, there is no need to tap holes into the wall. Poured wall water seepage comes in through the cracks in the wall and the cold joint where the floor and wall meet. Wall cracks should be sealed from the top down to within 4 inches of the floor.
Do-it-yourself Waterproofing Tips
There are several different signs of a wet basement. Checking your basement regularly for these signs will help you identify a leaky basement and address the problem before it becomes a major headache and a very expensive situation to remedy.
1. Water Stains
Water stains are the first clue to a wet, leaky basement. These stains could be along the walls or floor. These water stains could be a caused by something simple like overflowing laundry tub or you could a basement waterproofing problem as a result of water seeping in through the joint where the floor and walls meet.
2. Musty Smell
Excess stagnate moisture in a basement creates a musty smell, which can spread into your belongs stored in the basement and the rest of the home. The smell is not only unpleasant, it can be a sign that your basement is collecting water, which could lead to a big basement waterproofing problem.
3. Mold and Mildew
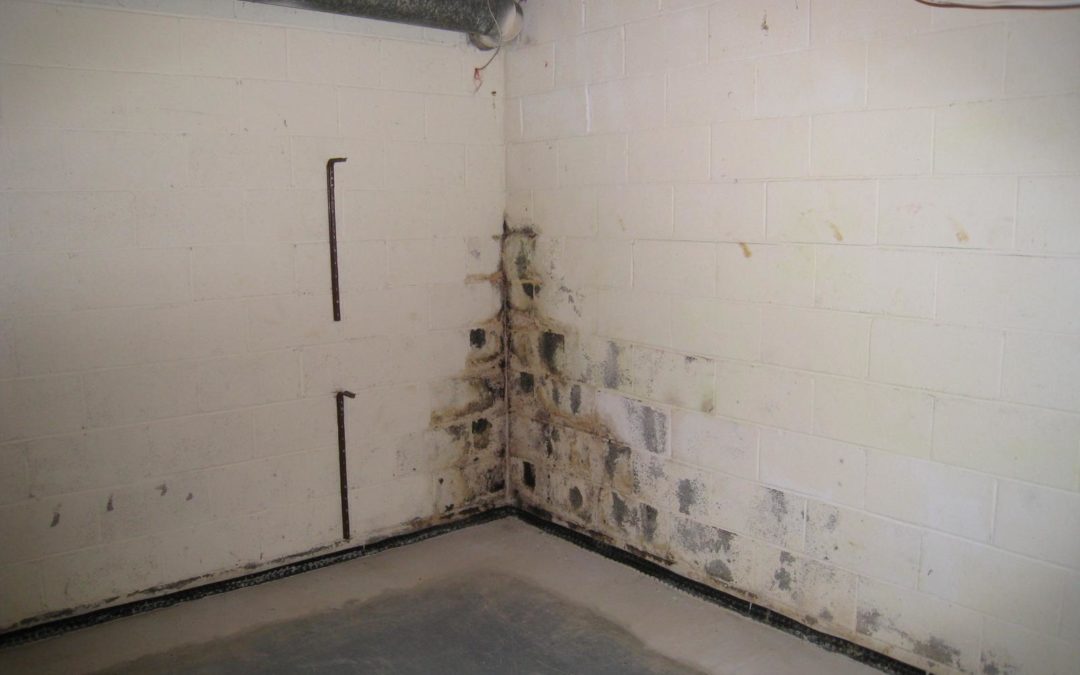
Mold and mildew come in a variety of colors including black, brown, yellow or green. You should get it tested to know for sure if it is mold. Find a local mold certified specialist to assess your problem basement. Often the northwest corner of a house is known as a “cold corner” and susceptible to developing mold.
4. Efflorescence
Efflorescence produces a white or sometimes grayish ash on the basement walls. Sometimes the white-gray stains have a slight sparkle. These stains are caused by salt deposits left behind after water has evaporated. Although some of the water has evaporated, you now know that water has an entrance into your basement and could cause severe water damage.
5. Concrete Spalling
Concrete spalling occurs when water gets inside the surface of concrete, brick or stone. Salt deposits in the water settle in the surface of the basement walls causing the face of the basement walls to flake away, peel or pop off. Concrete spalling reduces the integrity of your basement walls and allows an entrance for seepage.
Do-it-yourself Waterproofing Tips
1. Not managing roof water run off
The most commonly overlooked solution to a wet basement is actually found outside the home. Properly managing exterior water is always the first step when fixing a leaky basement. Having gutters installed with downspouts that take roof water a minimum of 8 feet from the foundation will help prevent water from pooling in the porous soil next the foundation.
2. Not sloping the soil along the side of the home away
The immediate soil outside of your foundation remains less dense than the virgin soil 3 feet out. That is due to two reasons – first, when the soil is back filled around the newly built foundation it cannot be packed down tightly because it would cause the foundation walls to cave in. Second, warm basements radiate their heat loss into the soil around the foundation making the first 6 inches spongy and causing water to soak up faster than the heavier compacted soil further out from the home. To help prevent water from collecting in that area, fill in any depressions along the sides of the home to slope away from the home.
3. Ignoring settling service walks
Some older homes have service walks along the sides of the house that settle over time. Be sure these service walks direct water away from the foundation and don’t block water from draining.
4. Falling for the cheap paint fix
Many DIY homeowners fall for the cheap waterproofing paint fix only to be disappointed a short time later when their water problem returns. When you paint the cement walls the lime in the concrete will create a white effervescence bubble between the wall and paint. This brittle bubble will break off in shale causing a bigger mess. Waterproofing paints are cheap for a reason – they just don’t last and can’t fix a seeping basement.
5. Sealing the cold joint
Never seal the seam where the floor and walls meet. Some homeowners choose to seal the cold joint with hydraulic cement in an attempt to plug-up where the water is entering the basement. When you plug-up this joint more pressure builds up in the walls and causes the water to move to another place in the basement. When that happens remedying the wet basement becomes a lot more work, because that hydraulic cement will need to be removed before installing a basement waterproofing system.